
Introduction to Apple Pie
Apple pie is a quintessential dessert that holds a special place in Western culinary tradition. Its origins can be traced back to medieval England, where the blending of apples, sugar, and spices encapsulated the essence of sweet treats. Over the centuries, apple pie evolved, showcasing various regional variations and techniques, but the core ingredient—a combination of tart and sweet apples encased in a flaky crust—remained constant. This dessert gained further popularity in the United States, where it became a symbol of comfort and home-cooked goodness, often cited in phrases such as “as American as apple pie.”
The significance of apple pie extends beyond mere sustenance; it represents community, family gatherings, and celebrations. Many families have their own cherished recipes, passed down through generations, often becoming a rite of passage for novice bakers. The act of preparing an apple pie can evoke nostalgia, bringing to mind memories of shared moments in the kitchen, the enticing aroma filling the air, and the warmth of a freshly baked pie cooling on the windowsill.
In today’s culinary landscape, apple pie remains a staple at holidays such as Thanksgiving and Christmas, as well as a favorite choice for potlucks and various gatherings. Its universal appeal lies in its versatility; while classic recipes call for Granny Smith or Honeycrisp apples, innovative bakers often experiment with different apple varieties, spices, and even alternative crusts to create unique flavors and textures. As people continue to embrace baking at home, learning how to make the perfect apple pie can be a rewarding experience. Through this article, readers will be equipped with the knowledge and skills necessary to create their own version of this timeless dessert, ensuring that apple pie remains a beloved recipe for generations to come.
Gathering the Ingredients
To create a delicious apple pie, the right selection of ingredients is crucial. The foundation of any great pie begins with the apples. For optimal flavor and texture, choose a combination of sweet and tart varieties. Popular choices include Honeycrisp, Granny Smith, and Fuji apples. Honeycrisp adds natural sweetness, while Granny Smith delivers a tart kick, balancing the overall flavor profile. It’s beneficial to mix apples, as this enhances the complexity of the pie’s taste.
Next, the pie crust holds equal importance in crafting an authentic apple pie. You can either purchase pre-made dough or prepare your own from scratch. For a homemade crust, common ingredients include all-purpose flour, unsalted butter, salt, and cold water. The use of butter is imperative, as it contributes a rich, flaky texture that complements the apple filling. If you prefer a more indulgent option, consider using a combination of butter and shortening for added flakiness.
Spices elevate the flavor of the apple pie, bringing warmth and depth. Traditional spices include cinnamon, nutmeg, and allspice. Each of these spices contributes its unique profile: cinnamon adds sweetness and warmth, nutmeg offers a hint of earthiness, and allspice combines flavors resembling cinnamon, nutmeg, and clove. A sprinkle of lemon juice is also recommended to brighten the apples’ flavors while preventing browning.
When gathering fresh ingredients, ripeness is essential. Choose apples that are firm to the touch, with vibrant skin and no blemishes. Checking for freshness in spices is equally important; older spices can lose potency over time. Aim to select your ingredients with care, as fresh, high-quality components significantly enhance the final product. By paying attention to these details, you set the stage for a truly outstanding homemade apple pie.
Preparation Steps for the Pie Crust
Creating the perfect pie crust is a crucial step in ensuring a delicious apple pie. The choice between homemade and store-bought crust will influence the overall flavor and texture, but both options have their merits. For those opting to make their own crust, begin by gathering your ingredients: all-purpose flour, unsalted butter, sugar, salt, and chilled water. Combining these elements creates a flaky, buttery foundation for your pie.
Start by mixing the flour, sugar, and salt in a large bowl. Next, cut the chilled butter into small cubes and add it to the dry ingredients. Use a pastry cutter or your fingertips to blend the mixture until it resembles coarse crumbs. Gradually add chilled water, one tablespoon at a time, mixing until the dough comes together. Be cautious not to overwork the dough, as this can result in a tough crust.
Once your dough is formed, shape it into a disc, wrap it in plastic wrap, and refrigerate for at least 30 minutes. This chilling process helps to relax the gluten, making it easier to roll out later. If you prefer a store-bought option, choose a high-quality, deep-dish pie crust that fits your pie pan. Ensure it is thawed properly if frozen, allowing for optimal flexibility.
When ready to roll out your dough, lightly flour a clean surface to prevent sticking. Gently roll the dough from the center outward, maintaining an even thickness. If the dough sticks, dust with more flour as necessary. Once rolled out, transfer the dough to your pie pan by folding it in half and laying it into the pan. Press the dough gently into the corners and trim any excess overhang. Finally, refrigerate the crust for another 15 minutes before filling it, ensuring it maintains its shape during baking.
Preparing the Apple Filling
To create an exceptional apple pie, the foundation rests upon a well-prepared apple filling. Begin by selecting the right apples; a blend of tart and sweet varieties such as Granny Smith and Honeycrisp is often recommended for a balanced flavor profile. Once the apples are chosen, proceed to peel, core, and slice them evenly. Utilizing a paring knife or an apple peeler simplifies this process. Aim for slices about ¼ inch thick to ensure they cook evenly during baking.
After preparing the apples, transfer them to a large mixing bowl. This is the stage where you will enhance the natural sweetness of the fruit. Combine the sliced apples with granulated sugar and a dash of cinnamon, which adds warmth and depth to the filling. While white sugar is traditional, alternative sweetening options such as brown sugar or even maple syrup can impart unique flavors. For those who prefer a less sweet pie, adjusting the sugar proportion to taste will yield a filling that suits different palates.
In addition to sugar and cinnamon, consider incorporating other spices such as nutmeg or allspice for added complexity. A squeeze of lemon juice not only brightens the flavors but also helps to prevent the apples from browning. Depending on dietary preferences or allergies, feel free to explore substitutes—such as using honey or agave for sweetening, which may offer a different texture and taste to the filling.
Once all ingredients are combined, allow the apple filling to sit for about 10-15 minutes. This resting period encourages the apples to release their juices, ensuring a succulent filling that bakes well. Ultimately, the key to a delicious apple pie lies in the careful preparation of its filling, which sets the stage for a delightful dessert.
Assembling the Pie
The assembly of an apple pie is a crucial step that requires precision and care to ensure a delightful dessert. Begin by preparing your apple filling, ideally using a mix of tart and sweet apples for a balanced flavor. Once your filling is ready, roll out the bottom pie crust and gently place it in a pie dish, ensuring that it fits snugly without any gaps.
Layer the apple filling into the crust, making sure to distribute it evenly. For added flavor, you may incorporate spices such as cinnamon and nutmeg into the filling before layering. To prevent the bottom crust from becoming soggy, consider sprinkling a thin layer of flour or cornstarch over the crust before adding the apples. This helps to absorb excess moisture during baking.
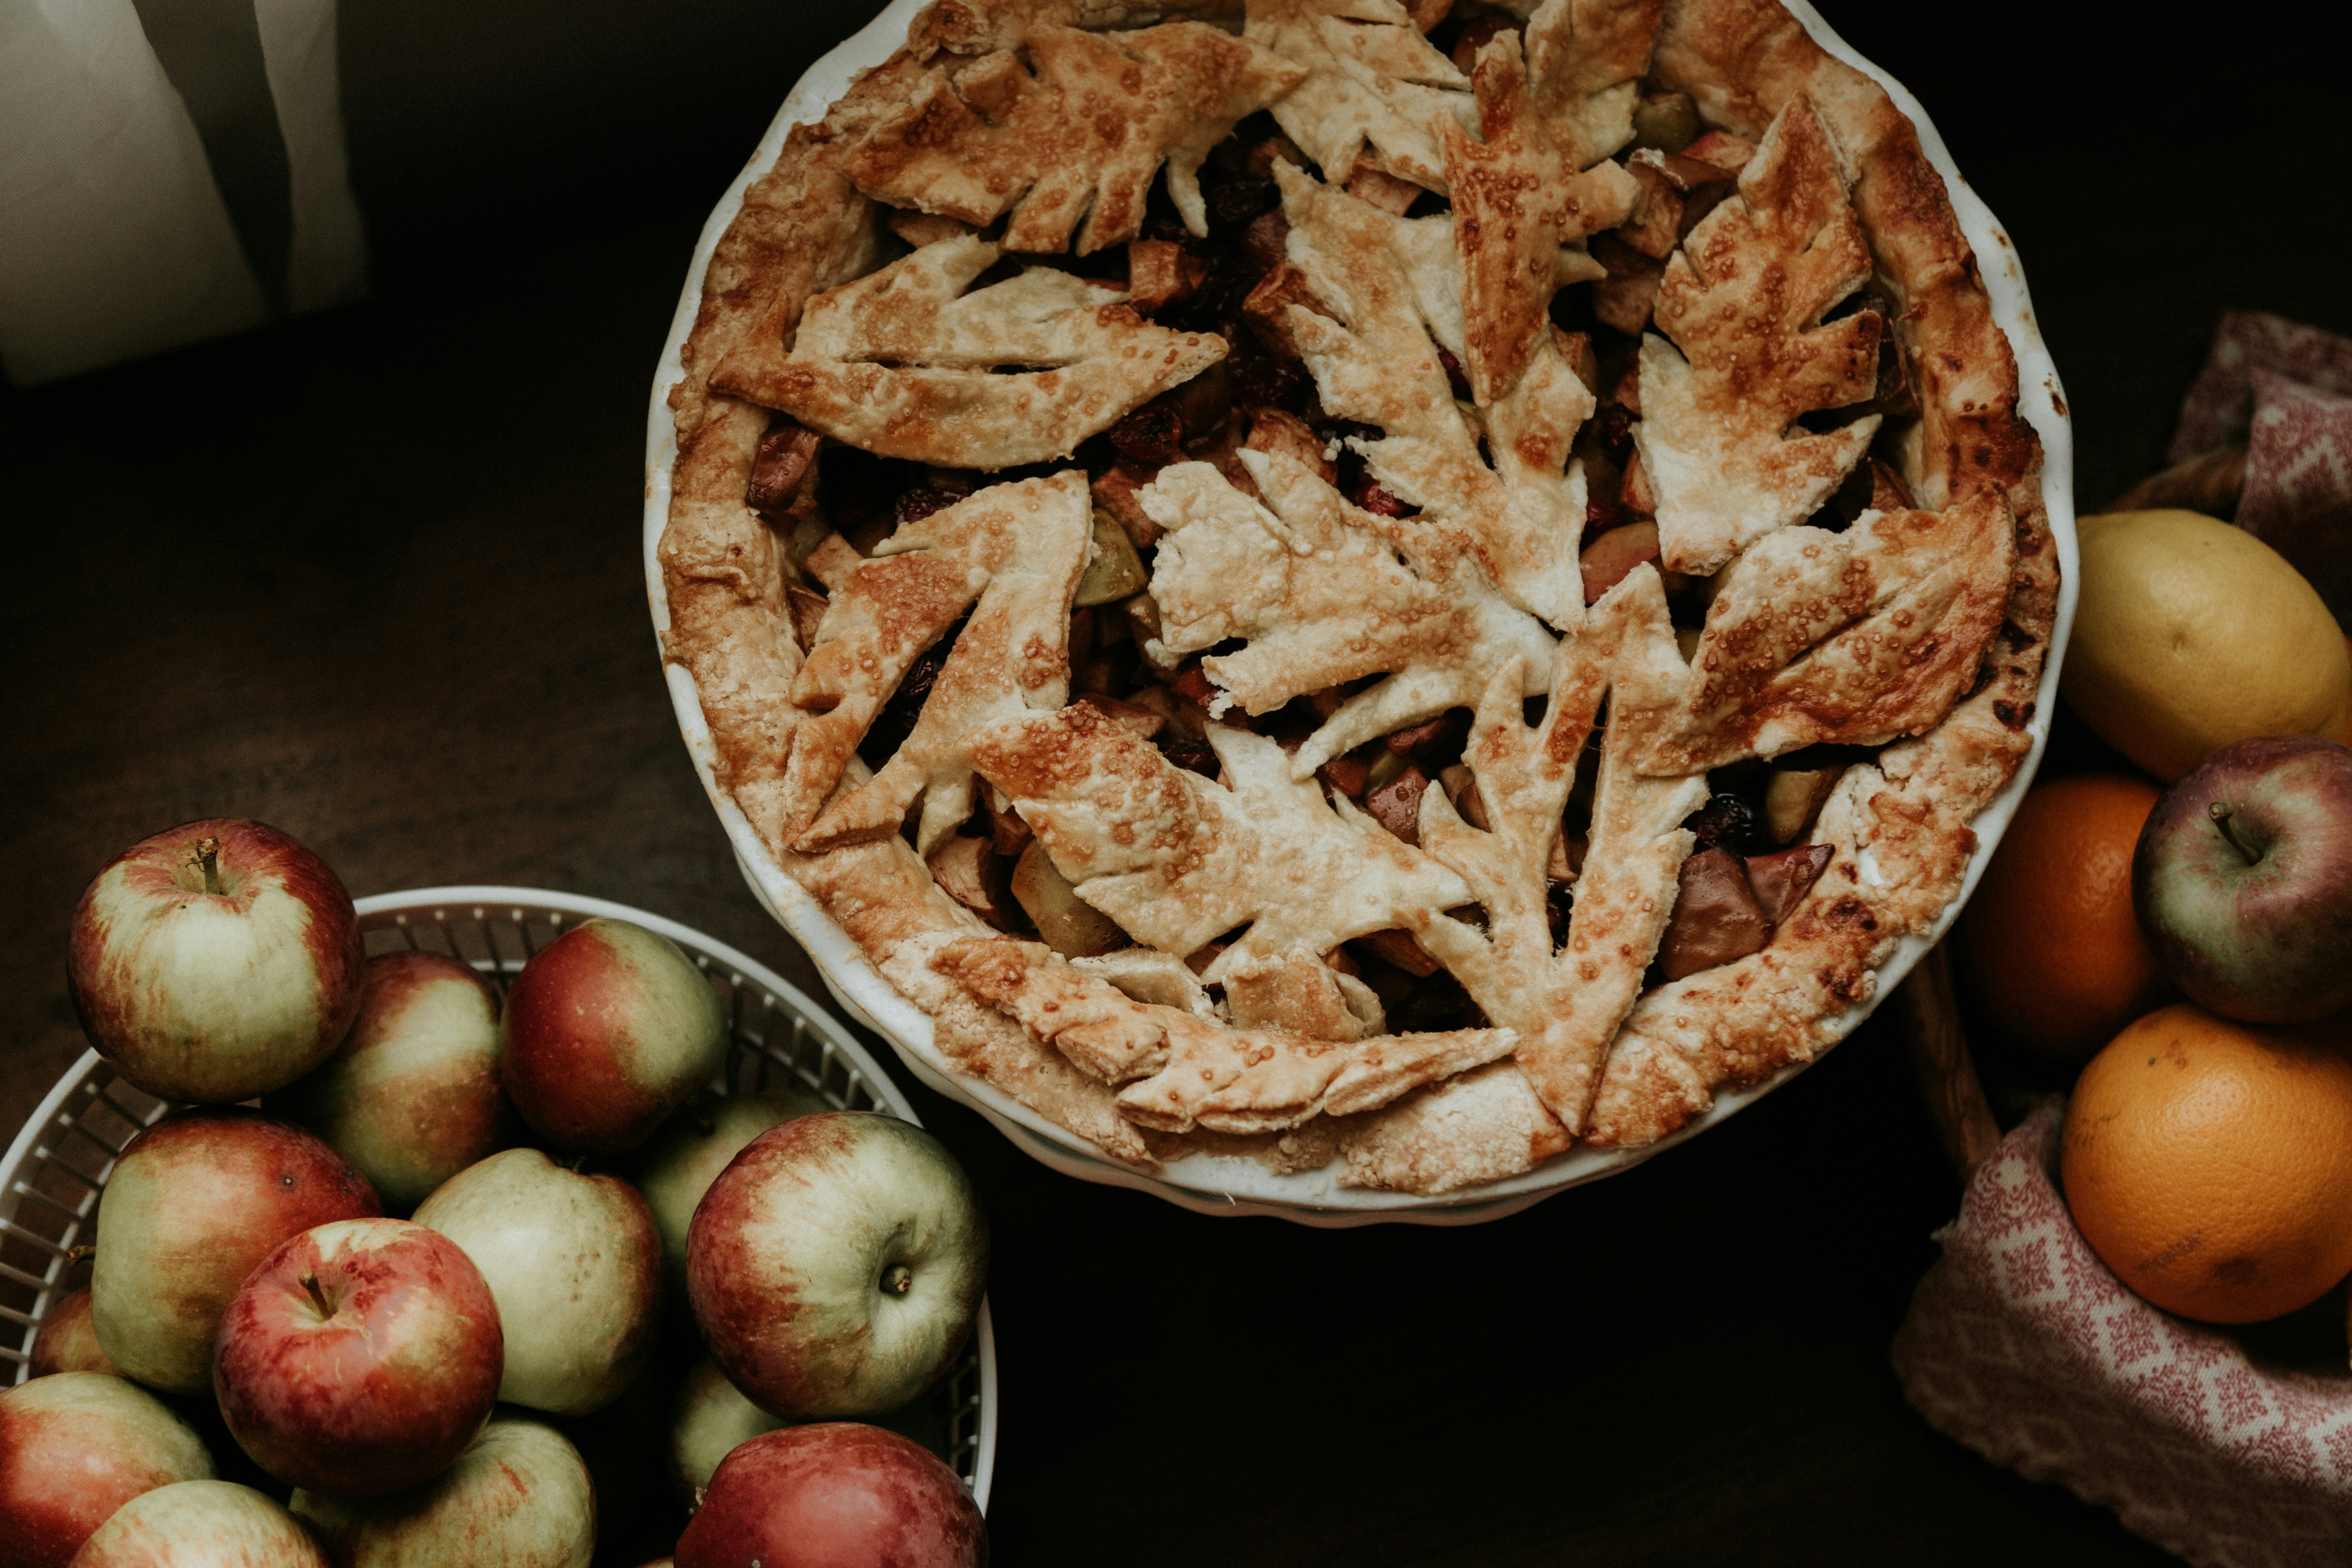
After layering the filling, it’s time to add the top crust. You have options here; you may choose to cover the entire pie with a solid top crust or create a lattice design for an appealing presentation. If using a solid top crust, cut a few slits into the dough to allow steam to escape, which will prevent your pie from boiling over. A lattice design, on the other hand, not only adds visual appeal but also allows for steam release while showcasing the delicious filling beneath.
Sealing and crimping the edges of the pie is an essential task. Press the top and bottom crusts together to seal in the delicious apple filling. Use your fingers or a fork to crimp the edges, creating a decorative border that enhances the visual appeal. Additionally, you can brush the top of the pie with an egg wash, which consists of beaten egg mixed with a little water or milk. This technique results in a beautifully golden and shiny crust after baking. Lastly, placing the pie in the refrigerator for a short while before baking can help to maintain its shape and texture during cooking.
Baking the Apple Pie
To begin the process of baking the perfect apple pie, it is essential to preheat your oven. Set the temperature to 425°F (220°C) to ensure the right cooking conditions for the crust and filling. Preheating the oven allows the pie to start baking immediately, creating a flaky crust and perfectly softened apples. While the oven is heating, prepare the pie by assembling the crust and filling, ensuring that they are well incorporated.
Once the pie is prepared, place it in the preheated oven. The recommended baking time for a standard apple pie is approximately 45 to 50 minutes. During this time, monitor the pie to ensure it bakes evenly. One technique to achieve a beautifully golden crust is to rotate the pie halfway through the baking time. Additionally, if the edges of the crust begin browning too quickly, protect them by wrapping the crust with aluminum foil. This allows the filling to cook thoroughly without further darkening the crust.
Determining when the pie is done baking is vital in achieving the best results. The pie is ready when the crust is a light golden brown and the apple filling begins to bubble through the vents or slits on the top crust. You can also check the apples by inserting a fork or knife to ensure they are tender. If the pie does not show these signs after the suggested baking time, you may need to bake it for an additional 5 to 10 minutes. Always allow the pie to cool for around two hours before slicing to ensure clean cuts and prevent the filling from spilling out.
Serving Suggestions and Storage Tips
When it comes to enjoying a freshly baked apple pie, the possibilities for serving are plentiful. A classic option is to serve the pie warm, potentially accompanied by a scoop of vanilla ice cream. The creaminess of the ice cream complements the warm spices and sweetness of the apples beautifully, creating a delightful contrast in texture and temperature. Another popular choice is to pair apple pie with whipped cream, which adds a light, airy element that enhances the overall experience. For those who prefer a more indulgent approach, a drizzle of caramel sauce on top can provide an extra layer of flavor.
Seasonal variations can also elevate your apple pie experience. For instance, serving the pie with a spiced cider or hot herbal tea can encapsulate the essence of autumn. Additionally, consider adding a sprinkle of cinnamon or nutmeg on top of the pie or the ice cream to enhance the existing flavors. Creative serving options might include transforming individual portions into pie a la mode or using mini pie dishes for an appealing presentation at gatherings.
Storage is equally crucial to maintaining the quality of your apple pie. To store a pie at room temperature, cover it loosely with foil or plastic wrap to prevent it from drying out. However, if you wish to preserve the freshness for an extended period, freezing is an excellent option. Cool the pie completely before wrapping it tightly in plastic wrap and then aluminum foil. This dual-layer method helps prevent freezer burn. When you’re ready to enjoy leftovers, simply reheat the pie in a preheated oven at 350°F for about 15-20 minutes, allowing it to warm evenly without compromising its flavor. This ensures that even after days, your apple pie remains delicious and satisfying.
